Zoom
The Following article explains how to configure Zoom integration for MEDIAL. This allows meetings that have been recorded to the cloud in Zoom to be ingested into MEDIAL.
Navigate to https://marketplace.zoom.us/ and sign in with your admin account.
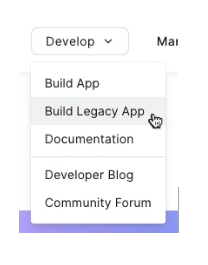
Once logged in click on the 'Develop' drop-down menu in the top right-hand corner and click Build Legacy App.
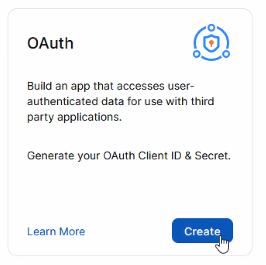
On the next screen click on Create.
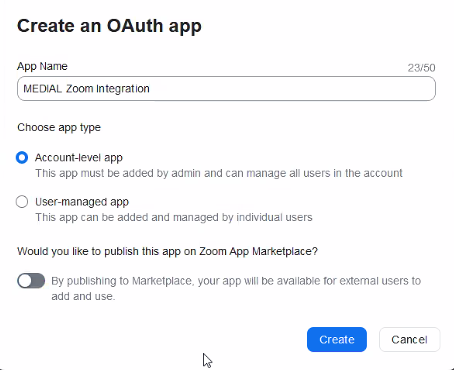
Type a name for the app and then ensure it is set to 'Account-level app'.
Ensure that the app is not set to be published on the Zoom App Marketplace.
Click Create.
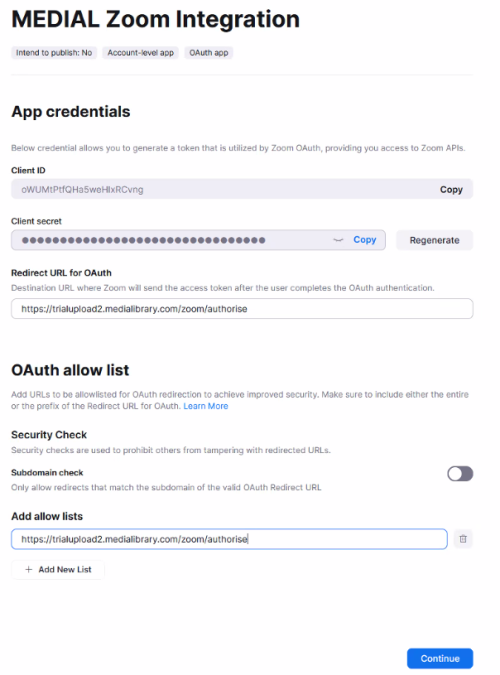
On the following screen make a note of the Client ID and Client secret by copying them into Notepad. Set the Redirect URL for OAuth to the URL of your MEDIAL upload/admin site, followed by './zoom/authorise'. For example: https://medialupload.domain.com/zoom/authorise
Enter this URL in for the 'Add allow lists'. The Security Check can be left turned off.
Click Continue.
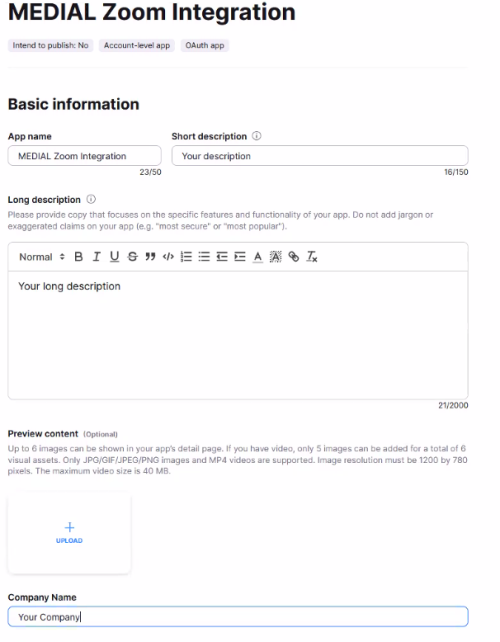
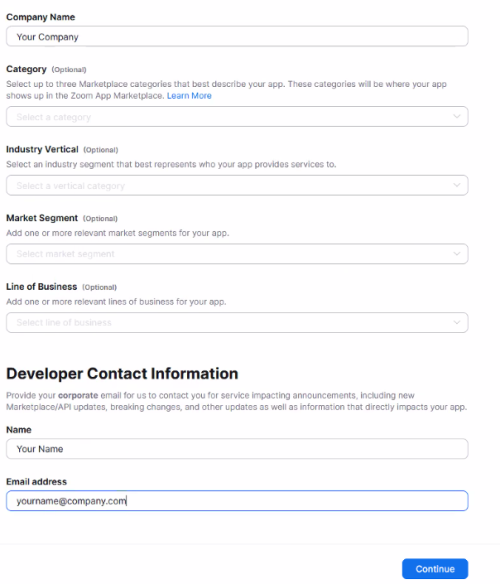
Fill in the following fields in the Basic Information area: App name, Short description, Long description and Company Name.
Enter in your name and email address for the Developer Contact Information, and then click on Continue.
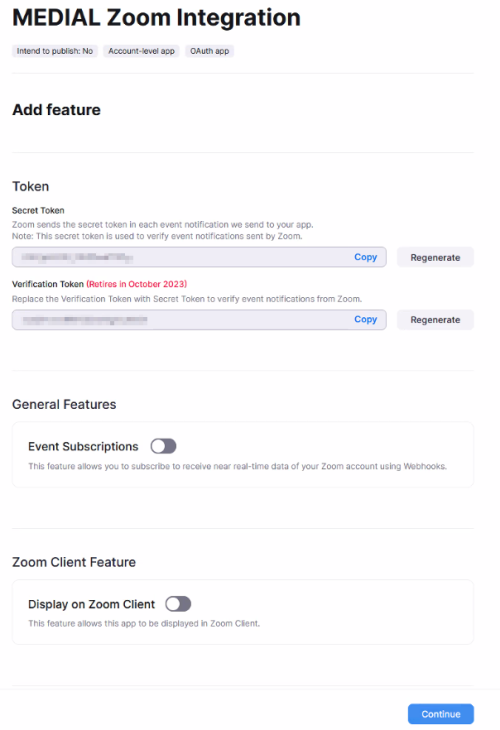
At the next screen click Continue.
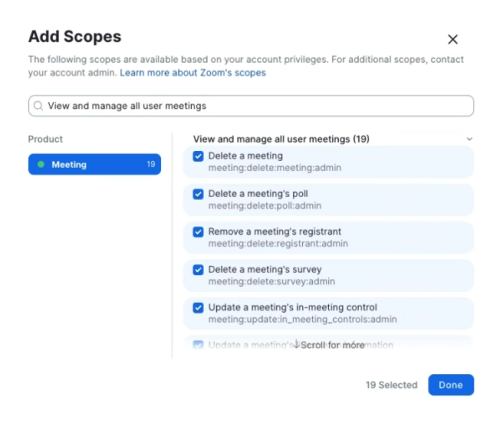
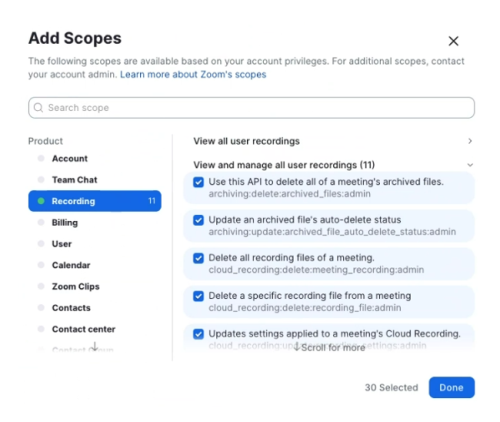
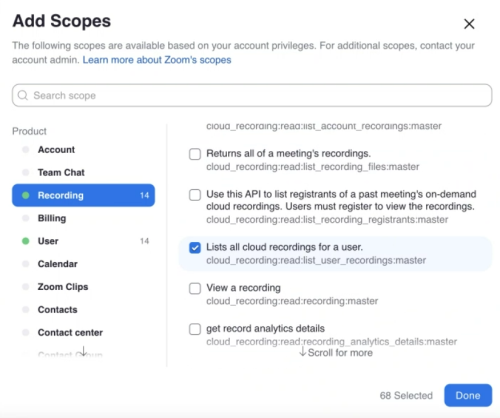
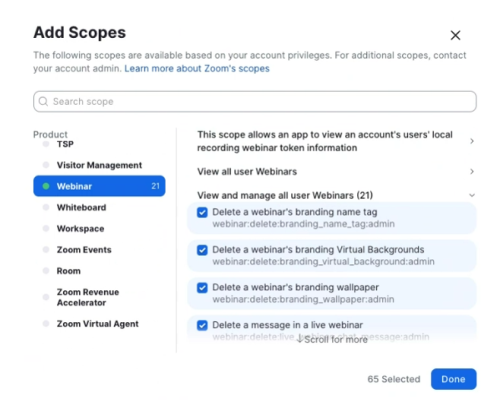
Click on Add Scopes.
Find and add all of the following scopes (click Done at the end after all of the scopes have been added, not after each set of scopes have been added):
In the Meeting scope, find and check all options under 'View and manage all user meetings'.
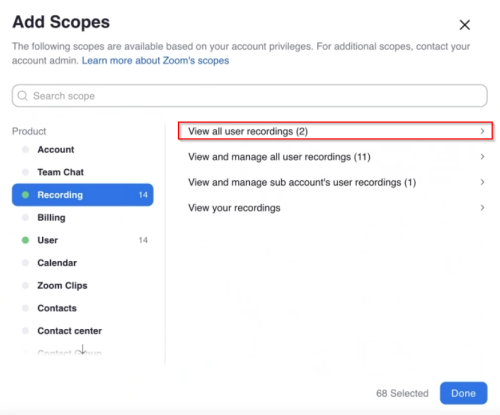
In the Recording scope, find and check all options under 'View and manage all user recordings'.
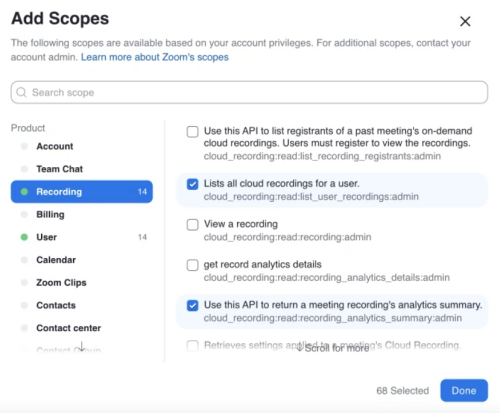
Under 'View all user recordings', check the boxes for the following options: 'Lists all cloud recordings for a user' and 'Use this API to return a meeting recording's analytics summary'.
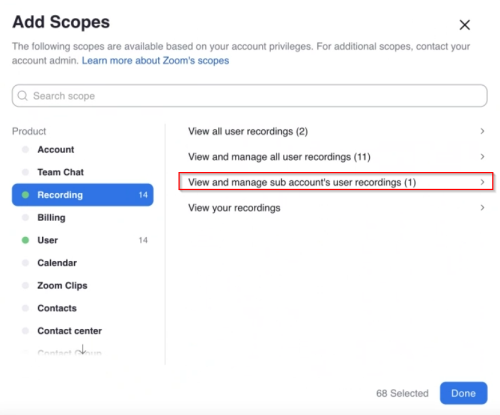
Under the 'View and manage sub account's user recordings' section, check the option for 'Lists all cloud recordings for a user'.
In the User scope, find and check all options under 'View all user information'.
In the Webinar scope, find and check all options under 'View and manage all user Webinars'.
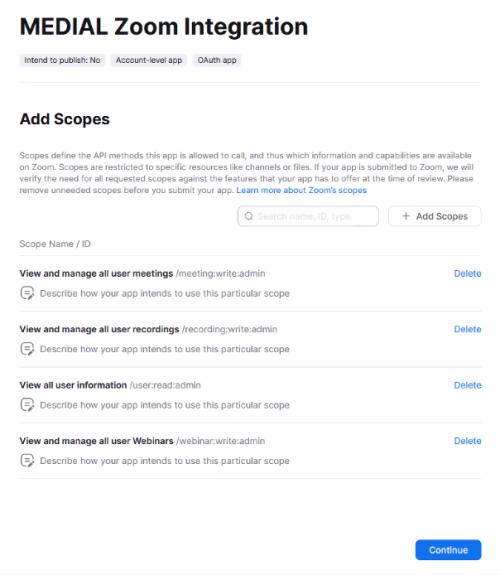
Once these have all been checked, click Done.
On the next screen it will show the scopes that have been added. Check that these are correct and then click Continue.
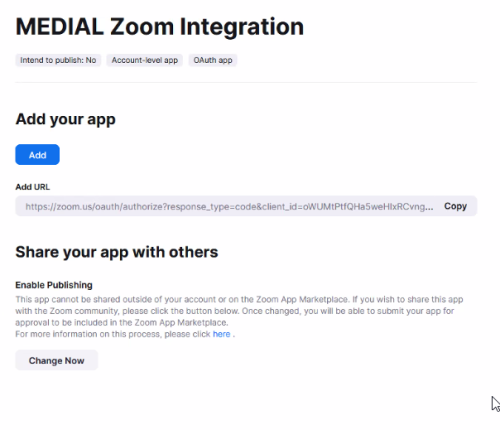
Before clicking 'Add' below, please continue to the next steps (below this screenshot) to configure the Zoom integration in MEDIAL.
Zoom Recording Layout Preference
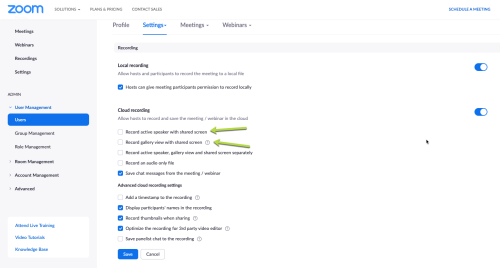
By default Zoom defaults to Gallery View for all recordings for all users in the account. This view means that the screen will be recorded without the active speaker being displayed in a thumbnail. To change this globally one of the following options can be checked:
For more information please see the following documentation on the Zoom site: Zoom Recording Layout
It is recommended to check only one option; either 'Record active speaker with shared screen' or 'Record gallery view with shared screen'.
MEDIAL Zoom Settings
Log into MEDIAL and navigate to the backend/upload site.
Click on the Zoom icon.
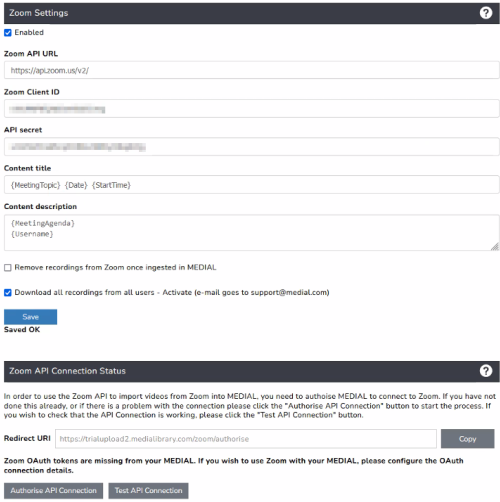
In the Zoom configuration area in MEDIAL, enter in the client ID, secret, and set the configuration preferences:
• Ensure that the box is checked the enable Zoom integration
• Set the Zoom API URL to: https://api.zoom.us/v2/
• Copy the client ID from the app in Zoom and enter it into the Zoom Client ID field in MEDIAL. This is the client ID noted down earlier.
• Copy the client secret from the app in Zoom and enter it into the API secret field in MEDIAL. This is the client secret noted down earlier.
• Check the box to remove the recordings from Zoom once they are ingested into MEDIAL if you would like them to be deleted from Zoom cloud storage once they have been ingested (Please see note below)
• If you would like recordings from all Zoom users to be ingested into MEDIAL check the ‘Download all recordings from all users’ box. All recordings will be ingested under the hmladmin account if no user exists with matching email address in MEDIAL
• The Content title and Content description fields can be left as the default for those values to be brought in from Zoom, or any of them can be deleted if they are not required
• Click on Save to save the changes
When recordings are deleted from Zoom cloud storage they are moved into the trash area in your Zoom Account. These recordings don't count towards the storage quota on your Zoom account, but will be deleted automatically after 30 days.
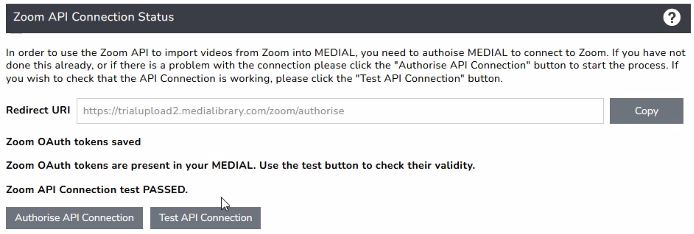
At the bottom of the screen, click on Authorise API Connection.
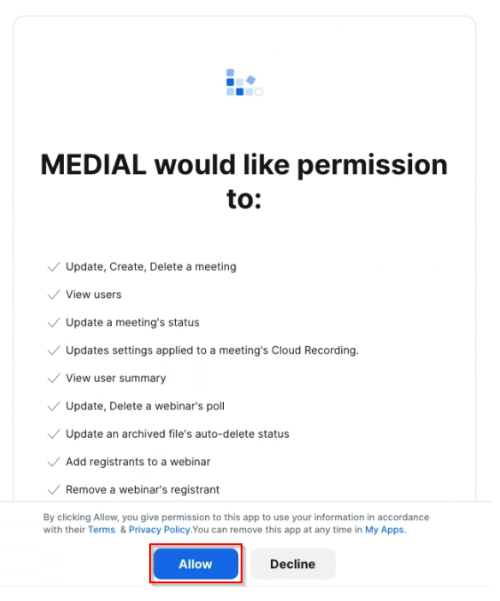
This will open the Zoom marketplace back up. Click on Allow.
Navigate back to MEDIAL. In the Zoom settings area, click on Test API Connection. If the API connection is successful a message should be displayed saying 'Zoom API Connection test PASSED'.
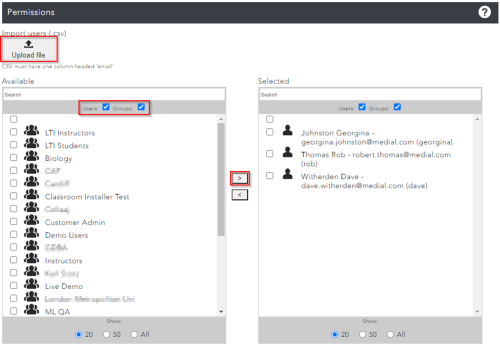
Click on the Permissions menu.
At this stage, either a .csv file can be uploaded with a list of users in from Zoom that meeting recordings should be ingested from, or users and/or groups can be selected and moved into the Selected window on the right to allow their meetings to be ingested. A .csv file of user names can also be uploaded which requires a column in containing a list of all the email addresses matching the users in MEDIAL and Zoom. If a user that is in the .csv file matches one in the Zoom account the meeting recording will be ingested in MEDIAL. When the .csv file is uploaded the users will automatically added into the 'Selected' area.
Any new meeting recordings in Zoom should now be ingested into MEDIAL if the user account exists in MEDIAL and has been allowed permission in the Zoom configuration area.
