Network Content
Move the Content Directory
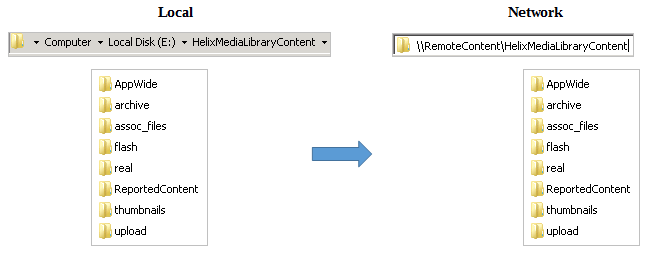
To minimize down-time, you can copy content to the new location while leaving the existing content in service until you switch to the new location. Ensure that the top-level Content directory is copied to the new location to replicate the folder structure beneath it.
Set Up Content Access
Be sure that you have completed the following steps, which are covered in previous topics:
- Create an account to be used by the media library. See Create a Service Account.
- Share and set permissions on the Wowza Media Server installation directory. See Set Permissions.
- Set the Wowza Services to use the service account. See Configure Services.
- Set the MEDIAL Services to use the service account. See Step of Configure Services.
- Set permissions on the MEDIAL installation directory. See Step of Share the Content Directory.
-
Configure the Wowza flash application. See Set up Flash.
Instead of creating a new Flash application in Wowza, you can edit the existing Flash application to point to the new content location.
- Change the anonymous authentication settings for the sites in IIS. See Change Anonymous Authentication Settings.
- Set the application pool to use the service account. See Set the Application Pool to use the Service Account.
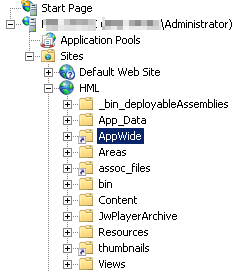
Change Virtual Directory Paths in IIS
In Internet Information Services (IIS), the HML and HML Upload sites have virtual directories that need to reflect the changed location of the content directory. There are 6 virtual directories:
- Four (4) for the HML site:
- AppWide
- assoc_files
- Flash
- thumbnails
- Two (2) for the upload site:
- AppWide
- archived_files
To change the virtual directories:
-
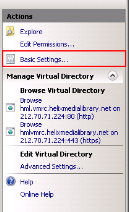
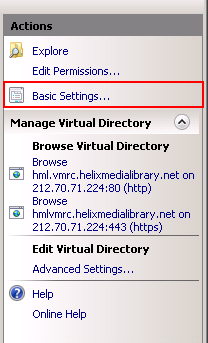
Open IIS and expand the HML website. Start by selecting the AppWide virtual directory.
-
On the right-hand side of the window click Basic Settings.
-
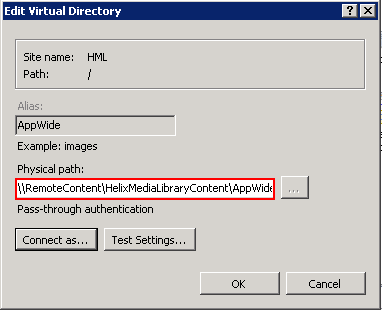
In the Physical path box remove the path to the local AppWide folder and enter the path to the one in the network location.
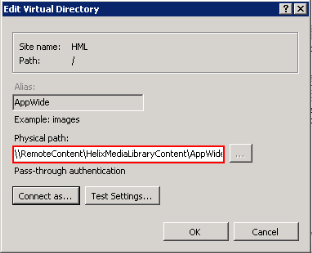
For example, change the local path:
E:\HelixMediaLibraryContent\AppWide
to the network path:
\\RemoteContent\HelixMediaLibraryContent\AppWide
- Click OK.
- Repeat the same steps for the remaining virtual directories.
Change File System References in MEDIAL
The file system references need to be changed in the media library to point to the new network content location.
- Log into MEDIAL as an administrator and click on the cog icon—
 —to open the administration site.
 -
Click on the Settings menu item to navigate to the Settings section.

-
Under File System References, change the file system references to point to the new location of the content folders. For example:
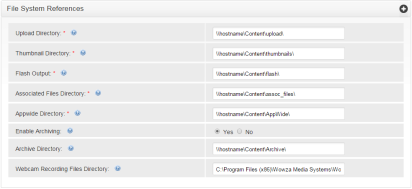
The Webcam recording files directory does not need to be changed as this will point to the content folder in the Wowza directory.
- Click Save at the bottom of the page.


|
©2025 Streaming Ltd | |