SSL Certificates
Create a Certificate Request
The certificate request provides information about your organization that the certificate signing authority uses to generate the certificates.
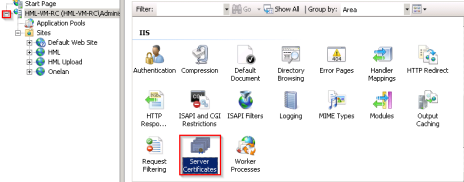
- Open IIS by clicking on the Windows icon —
 .
. - Type Internet Information Services and click the IIS Manager when it appears.
-
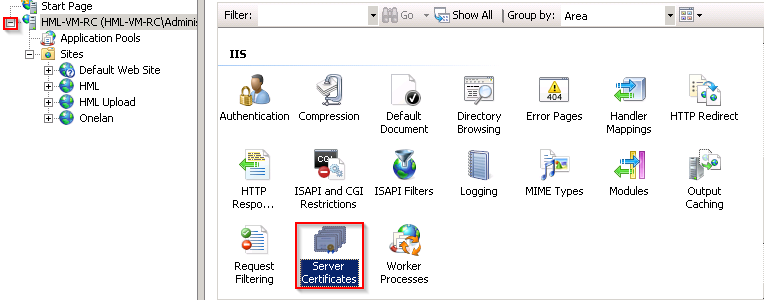
Expand the main node and double-click Server Certificate.
-
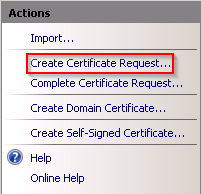
From the right-hand options, choose Create Certificate Request…
-
In the first page of the wizard, fill out the details of your organization and click Next.
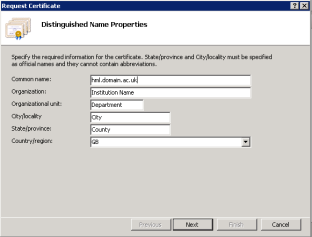
The common name should be the fully qualified domain name of the site. If you are generating a wildcard certificate request, enter only the institution's domain, such as domain.ac.uk.
-
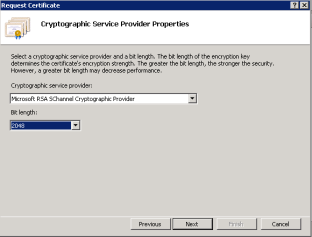
Leave the Cryptographic service provider set to the default value, but change Bit length to at least 2048 bits. Click Next.
-
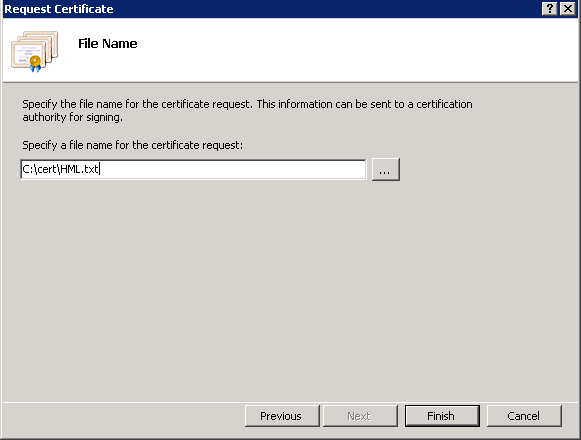
Save the certificate request to disk and click Finish.

- If the certificate request uses a wildcard for the domain, you need only the single request file. If the certificate request was for a specific site only, repeat the process for the other MEDIAL site.


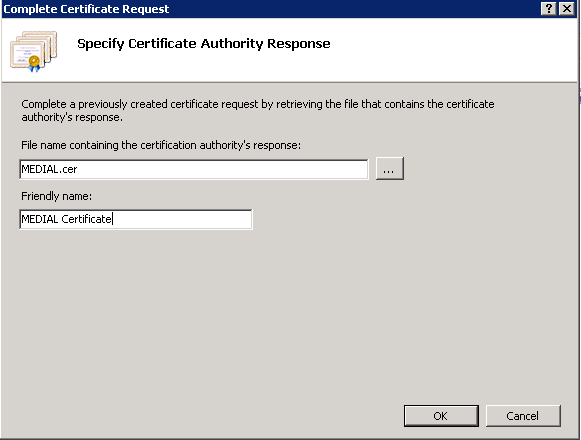
Complete the Certificate Request
When you have generated one or more certificate requests as needed, submit them to your preferred certificate signing authority. Once the certificate request has been fulfilled by the authority, complete the certificate request in IIS.
-
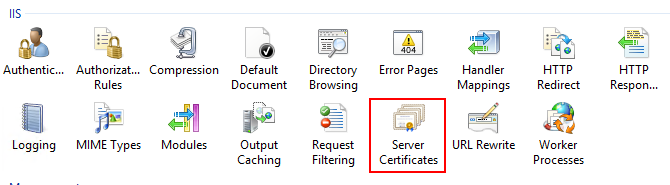
In IIS, select the main server node and double-click Server Certificates.

-
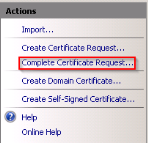
From the options on the right side, choose Complete Certificate Request…
-
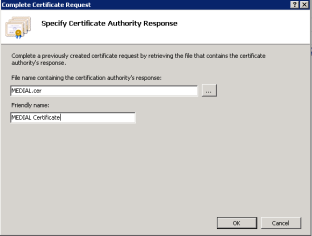
Locate the certificate and give it a friendly name that allows you to identify the certificate easily. Click OK.
-
If this is a wildcard, the certificate can be used for both MEDIAL sites. Repeat the process if you have another certificate to add for the upload site.

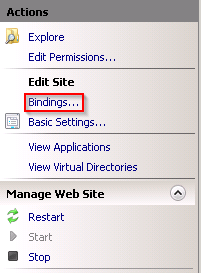
Apply the Certificates
-
Expand the server node in IIS. Expand the sites node and click on the MEDIAL site.
-
On the right side click Bindings…
-
Click Add.
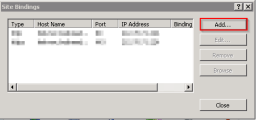
-
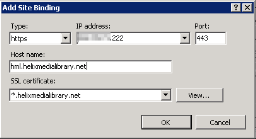
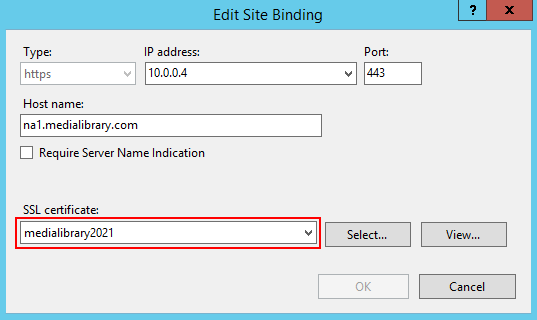
Add the site binding, selecting the correct IP address from the site. Choose the certificate from the SSL certificate drop-down box. If your certificate is a wildcard one, enter the FQDN of the site in the Host name box. Click OK.
- Click Close on the Site Binding window and repeat the process for the upload site.


Require SSL Access
Once you have obtained and applied the certificates, it is recommended that you redirect HTTP traffic to the sites to go via HTTPS. This will ensure that users login credentials are sent securely.
-
Download the IIS 10 URL redirect module from the following location: https://www.iis.net/downloads/microsoft/url-rewrite
-
Install the module by running the download and following the prompts.
- Once it has been installed, navigate to the installation of MEDIAL (typically C:\MediaLibrary) and open the 'vls' folder. Edit the web.config file, and inside the <system.webServer> tags paste in the following text:
<rewrite>
<rules>
<rule name="HTTP to HTTPS" stopProcessing="true">
<match url="(.*)" />
<conditions>
<add input="{HTTPS}" pattern="off" ignoreCase="true" />
</conditions>
<action type="Redirect" url="https://{HTTP_HOST}/{R:1}" />
</rule>
</rules>
</rewrite>
Ensure that the above text is pasted into the correct XML tags in the web.config file. Paste it into the file just below the <system.webServer> tag.
4. Repeat the process for the web.config file in the 'upload' folder.
Change URL References
If you are enforcing secure access, update the MEDIAL base URLs to use HTTPS rather than HTTP.
-
Log into MEDIAL as administrator and navigate to the administrator site. Click Settings.

-
Expand the URL References accordion and change the front-end and upload site URLs from http to https. Click Save at the bottom of the screen.
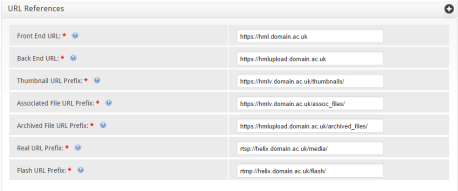

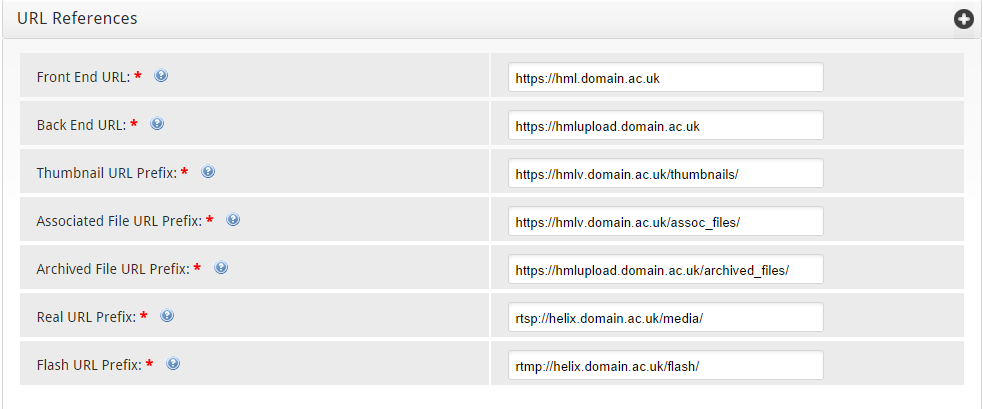
Do not change the MEDIAL URLs for RTSP and RTMP. Doing so will prevent streaming playback.
Replacing SSL Certificates
When the SSL certificates used by MEDIAL and Wowza have expired, or before they expire, they will need to be replaced.
To do this, start by following the steps at the beginning of this topic to generate a new certificate request.
This should cover all of the host names used by MEDIAL, i.e. the front end site, upload site, and playback URL.
Once the new certificate has been obtained complete the request in IIS as described above in the 'Complete the Certificate Request' section.
To apply the certificate, follow the instructions in the 'Apply the Certificate' section above, however instead of adding a new binding to the websites, click on the SSL binding and then click 'Edit'.
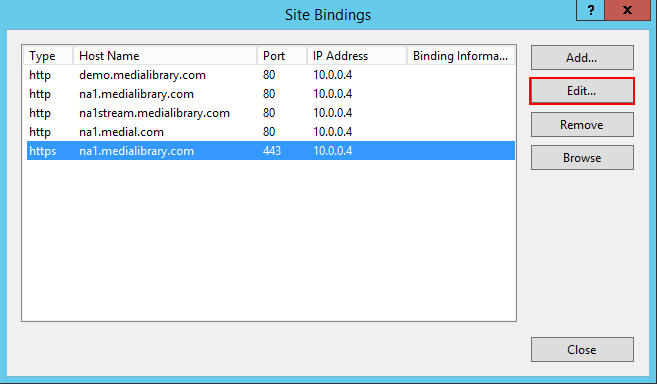
From the drop-down box select the new certificate. Click OK and repeat the process for the upload site.
To install the certificate in Wowza, it needs to be exported from IIS and converted into a .jks file. Before doing this, navigate to the Wowza installation directory, and open the Vhost.xml file in the conf directory in Notepad.
The installation path will look similar to the following: C:\Program Files (x86)\Wowza Media Systems\Wowza Streaming Engine 4.6.0\conf
Locate the SSL section which starts with this heading: <!-- 443 with SSL -->
Make a note of the certificate name which is in the KeyStorePath tag, and the password for it in the KeyStorePassword tag. These can be used for the new certificate so this file does not need to be edited.

In IIS, double-click the Server Certificates Menu icon.
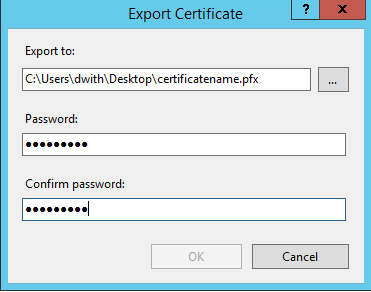
Locate the new certificate and right-click it, then click Export...

Call the certificate a name of your choice, and use the same password that was noted down from the Vhost.xml document as mentioned above. Click OK to save it.
The .pfx certificate now needs to be converted to a .jks one. To do this, follow the steps in the section here: Configure SSL for Wowza
When saving the .jks file, use the name noted down from the vHost.xml file mentioned earlier.
Delete the existing .jks certificate file from the Conf folder in the Wowza installation directory, and copy in the new .jks certificate.
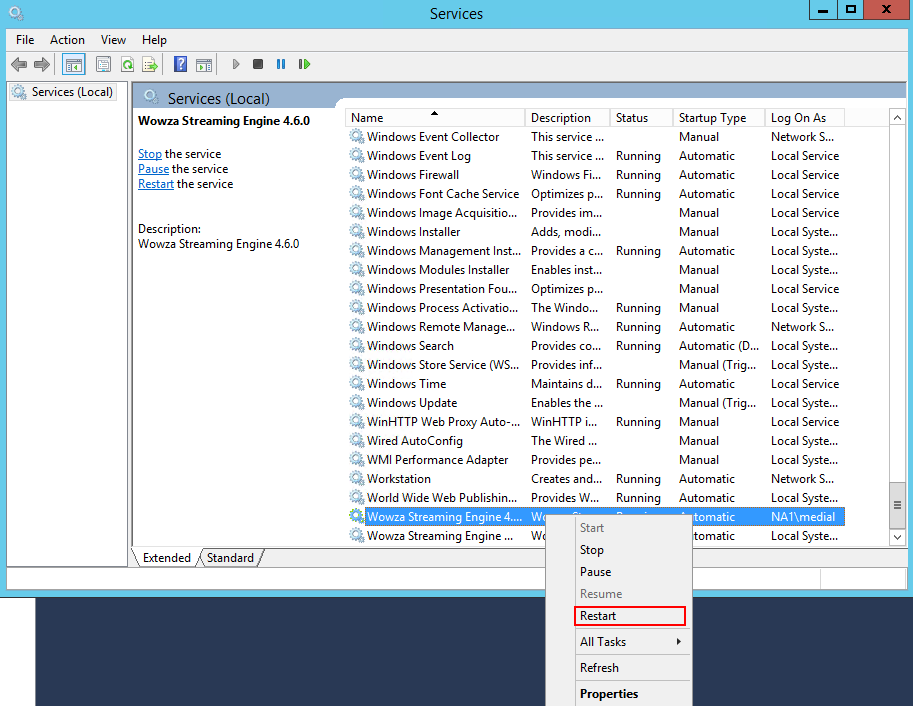
Open Services and restart the Wowza Streaming Engine Service.
Log into MEDIAL and check that the sites are displaying correctly and using the new certificate, and that playback of content is working.

|
©2025 Streaming Ltd | |